Showing posts with label Designs using CTMH Cricut Cartridges. Show all posts

Sunday, March 27, 2016

Circle Telescoping Card

Singing Butterfly Adornments
Darcel Kirvan – An Independent Close to my Heart Consultant

Circle Telescoping Card


Supplies Needed:


-          Circle punches, die cuts or circle cutters
-          Plain or patterned cardstock
-          Brads (2-3 per card)
-          Ribbon
-          Piercing tool or scissors
-          Stamps and inks
-          Decorative elements of your choice
-          Adhesive


1.   Cut three circles (each successively 1” smaller than the previous circle.) 
Recommended sizes:  Rear: 5”, Middle: 4” and Top: 3”.

2.  If you want to add decorative layers to each level, cut circles ½” smaller than the base sizes.
Recommended sizes:  Rear: 4 1/2”,  Middle: 3 ½”, Top: 2 ½”

3.  Decorate each layer as desired with stamped images, die cuts or other embellishments.


4.  Pierce a hole in the bottom of the middle circle.  (Approximately ½” up from edge, or where desired to achieve the correct alignment/placement of the circles.)

5.  Turn the middle circle upside down and place it on top of the bottom layer. This alignment is the most difficult step in making these types of cards.

6.  Use the hole in the middle circle as a guide for placement of the hole in the bottom layer.  Pierce a hole in the bottom layer.

7.  Attach the middle and bottom layers together by inserting a brad through the two holes.

8.  Pierce a hole in the bottom of the smallest/ top circle.

9.  Turn the smallest/top circle upside down and place it on top of the middle layer.

10.  Use the hole in the smallest/top circle as a guide for placement of the hole at the top of the middle layer.  Pierce a hole in the middle layer. 

11.  Attach the smallest/top layer to the middle layer by inserting a brad through the two holes.
 
12.  Attach a short loop of ribbon to the top (rear side) of the smallest/top layer.  You can attach the ribbon with another brad or use adhesive.  (The ribbon is used to hang the card up.)


13.  Rotate the top layer so that it is on top of the middle layer.  Rotate the top and middle layer so that the card appears to be one single circle.


Easter Bunny Circle Telescoping Card

Singing Butterfly Adornments
Darcel Kirvan – An Independent Close to my Heart Consultant

Easter Bunny Circle Telescopic Card


Supplies Needed:
- supplies required for general circle telescoping card
- Cricut machine, mat and supplies
- Cricut Art Philosophy cartridge
- googly eyes
- stamp for Easter sentiment

Cutting Instructions:
Ears (white cardstock)
Page 59 – Cut 2 of the petal #2 at 2.5”

Inside Ears (pink cardstock)
Page 59 – Cut 2 of the petal #2 at 1.5”.

Stomach (pink cardstock)
Page 42 – Cut 1 of the oval #3 at 2”.

Feet (white cardstock)
Page 42 – Cut 2 of oval #3 at 1.5”.

Foot lining (pink cardstock)
Page 42 – Cut 2 of oval #3 at 1”.

1. Follow the assembly instructions for the circle telescoping card.

2.  In step #3, attach the ears to the small/top circle. Attach the stomach lining to the middle 
circle.  Attach the feet to the large/bottom circle.  Decorate the face and the rest of the card
as desired.  


Saturday, February 13, 2016

Simple Valentine's Day Cards

They say that it's the thought that counts - so even a simple, handmade Valentine's Day card can show you care.


The CTMH Share The Love CC1060 stamp is featured for the month of February only. This D sized stamp features phrases and images that can be used to tell friends, family and other loved ones that you care.  As an added bonus, $7USD for each stamp sold is donated to the charity Operation Smile.  

My first two valentine's cards feature images and sentiments from this special stamp.


A mini card
Ink colour: Ruby
Embossing powder: Clear Z2088


The rest of the Valentine's Day cards feature the emboss resist technique using clear embossing powder (Z2088).


Floral image & sentiment from Someone Special C1607
Ink colours: Ruby, Lagoon and Pixie
Cardstock: White Daisy, Lagoon and Pixie

Image from Quick Cards: Butterfly A1120 (Retired)
Ink colours: Gypsy, Lagoon, Pixie
Cardstock: White Daisy, Lagoon and Pixie

Floral image from Someone Special C1607
Sentiment from Coming Up Roses C1579 - RETIRED
Ink colours: Ruby, Pixie and Black
Embellishment: White Shimmer Trim Z3024


Sentiment & images from To the Moon B1507
Ink colours: Sapphire and Twilight (retired colour)


Thanks for visiting, now follow this link to Heather's blog.

Saturday, January 2, 2016

Cascade cards for milestone occassions


The "complex" cascade card really isn't as complex as it seems.  The key is precision when cutting and measuring.  If this is done properly, the two halves of the card base slide together easily.

To make my cards, I followed the instructions and detailed diagrams found at:

This cascade card is to celebrate the 50th wedding anniversary of my parents.  I used a white and gold colour scheme to commemorate this golden anniversary. The cardstock is CTMH White Daisy.  (All of the gold cardstock is non-CTMH).  

The images on the card are a combination of diecuts using CTMH Cricut Art Philosophy cartridge and heat embossing using the gold embossing powder (Z2066) and the January 2016 Stamp of the Month: Beloved Bouquet (S1601).


Tuesday, March 10, 2015

Get it before it's gone - Seasonal Expressions 1


Welcome to the Brae-er's Circular Blog Hop!  This month we are focusing on the products we love from the Seasonal Expressions 1 Idea Book.  Many of the fantastic items in this book are only available to order until the end of March. Hopefully, you will be inspired by the blogs in this hop and get your Seasonal Expressions 1 items before they are gone forever!

There are so many great products to choose from: Heartstrings paper pack and accessories (it's one of my favourite CTMH papers ever), Hopscotch paper pack and accessories, You're The Bomb stamp set (which features many great sayings), the puffy stickers and so much more. 

The product I choose to focus on is the Hopscotch Picture My Life (Z3045). There are enough cards in one small pack to make so many things.  I made two My Creations Mini Books (Z3044 and Z3043).  (These Mini Books were introduced in the Seasonal Expressions 1 Idea Book but they will continue to be availalbe after March.)

One book is  an overview of the four seasons of 2014, while the other is more of a journal about me (my favourite things, friends, etc.)  Completing these two books took less than half the Picture My Life cards leaving enough to complete some standard scrapbooking layouts, Picture My Life pocket scrapbooking layouts and even greeting cards.  The possibilities for these cards are endless! Better still, the cards make projects so quick to complete. 

The Hopscotch paper and Picture My Life series are so bright and colourful - applicable to so many situations.  I also like that many of the PML cards focus on happiness -  a concept that should be celebrated.

Now all I need to do is add photos, stamps and other items to personalize my mini albums even further!

Here are a few of the pages:

Year in Review - The Four Seasons mini album

Layer two 4"x6"cards for the cover design

Add personal details to this card.  I am
going to add the numbers so that the card says Happy 2014.

Beside the winter themed card, add a 3"x 4" picture.

On the cloud and rainbow card you can add photos or journaling
to celebrate your Spring highlights.

Add a list of summer highlights to the flower card.

Add a fall themed photo to the ornate orange frame card.


All About Me mini album


For more information on Hopscotch Picture My Life or other Seasonal Expressions 1 products speak to your CTMH consultant or check out my website at kwregion.ctmh.com.

Now check out the next blog in our hop:Jessica Fenn Hill's Create by the Lake 

Thursday, October 16, 2014

SSSHH!!!! November is the month for DIGITAL SCRAPBOOKING!

November marks the five-year anniversary of Studio J®, and that means it’s your lucky month, with five amazing ways to win through Studio J and Close To My Heart social media!
 
First, throughout the month of November, all layouts purchased in Studio J are $5! That is a savings of over 25% off of retail!      
 
Your second chance to win big must come by sheer luck: every fifth order placed in Studio J during November receives a FREE surprise Close To My Heart accessory in its shipping box! The accessory has a retail value of $5 or more.
 
If luck doesn’t smile on you in that way, you might stumble upon it by finding a little extra something in your Studio J box. Five “golden tickets” will be sent out during the month of November with randomly selected Studio J print orders! This “golden ticket” is redeemable for one of Close To My Heart’s new D-ring albums* loaded with 10 Top Load Memory Protectors™.
 
For a fourth way to win, simply create new, gorgeous layouts in Studio J, select your favorites, and then post pictures of them on Close To My Heart’s Facebook page using the hashtag #ctmhlucky5. After November 30, five lucky winners will be selected from the entries based on their artistry and creativity and each of these winners will receive their own D-ring album loaded with 10 Top Load Memory Protectors!
 
And there is one last way to win: take your new Studio J artwork and post a picture of it on Instagram using the hashtag #ctmhlucky5. Just as it is with Facebook, after November 30, five lucky winners will be selected from the entries to receive their own D-ring album loaded with 10 Top Load Memory Protectors!
 
Plus, there is a bonus Consultant-only way to win. After the campaign has ended, the top five Consultants who had the greatest number of customers who order during the campaign will also get a D-ring album loaded with 10 Top Load Memory Protectors! This sixth way to win is only open to Consultants, so make sure to encourage every one of your customers—new to Studio J or not—to start designing now.
 
And to make things even more exciting, starting November 1, five brand new kits from the Annual Inspirations idea book will be made available in Studio J, so you can create new artwork using the latest papers and embellishments from Close To My Heart. With so many ways to win, five may be your new lucky number! Log in to Studio J and start creating today.
 
*Offer valid November 1–30, 2014. Pattern and color of new D-ring album to be given to winners will be at Close To My Heart’s discretion based upon availability. New kits available in Studio J® on November 1 include Confetti Wishes, Snowhaven, Seaside, Pathfinding, and Scaredy Cat.
 
No tax or shipping will be charged on the free item(s). Studio J layouts ship in a protected box that can hold 4 to 50 two-page layouts. For additional information about shipping/handling, please visit StudioJ.com.

Dates: Offer valid November 1, 2014–November 31, 2014. 

Saturday, October 11, 2014

So Happy With CTMH - Brae-ers October blog hop


Time for another Brae-er Team Blog Hop: So Happy With CTMH
This hop was inspired by the 30 days of happy campaign from Close to my Heart in September. 

If you have come from Rosalynd Kelly's  blog then you are on the right track.


I was (and still am) a die hard fan of Cricut.  I used to look at the official Cricut page and dream about the cartridges I had yet to own.  There were three cartridges that I just had to have, but they couldn't be bought off the Cricut website or in any local craft store.  They were made by a company that I had never heard of at the time.... Close to my Heart.

It was those cricut cartridges: Art Philosophy, Artiste and Artbooking that attracted me to Close to my Heart and caused me to sign up as an Independent Consultant.  I had never been to a CTMH party or viewed the product in person; I was putting my faith in the Cricut product.

Here I am one year later, so in love with the quality, colours and range of CTMH products.  Still, it's the Cricut cartridges that drew me in and keep me coming back for more.  I can't tell you how much I adore all of the options available on the newest CTMH Cricut cartridge: Artfully Sent. It is fantastic and SOOO, SOOO easy to use. (I haven't even tried most of the options or the stamps yet but I can't wait!)


Here are a few quick and simple creations made using the CTMH Cricut cartridge Artfully Sent:


To see a few more of the cards I've made with Artfully Sent, check out my postings on September 22 and 24.

Thanks for visiting my blog!    
Darcel

For more information: contact me at closetomyheartkw@gmail.com
or check out my website at kwregion.ctmh.com.


* * * * * *
I hope you have enjoyed your stop here. Be sure to visit your consultant's website for more information about the fantastic October promotions. 

Now on to Sheri's blog.

For a complete list of blogs on this hop, see Brae's Blog.

Enjoy the tour!

Thursday, October 9, 2014

Lots of crafting on World Cardmaking Day

October 4th was World Cardmaking day!
 
Alas, I did not spend it making cards; however, I did spend it making some great fall themed projects with a group of enthusiastic adults in Woodstock.


We made four projects:
- a haunted house canvas
- a Thanksgiving sign
- Halloween pencil toppers
- a fall themed picture frame
 
Haunted House Canvas
 Materials required:
 - scissors
- 6x6 canvas (Z1818)
- various colours of cardstock: black, white daisy, honey,
- acrylic paint
- brush or sponge
- Mod Podge
- ribbon (from Michaels)
- pencil crayons or markers
- Cricut artbooking cartridge (Z1906)
- Cricut machine
- Stamp set Frightfully Fun (B1453)


1.   Paint the canvas with an acryllic paint colour of your choice.  This one combines purple with some olive green.  Set aside to let it dry.
 
2.  Stamp four to six Halloween characters on a strip of white cardstock. Set aside to let the ink dry completely so that it won't smudge.

3.   Colour the characters with pencil crayons or markers as desired.
4.  Cut out the characters using scissors.
5.  Cut out the haunted house shape from the Artbooking cartridge (page ).   Cut at  4.75" Real Dial Size.
 

6.  Use scraps of Honey cardstock to fill in the windows with the appearance of light. 
 
7.  Apply a coating of Mod Podge to the now dry canvas.
 
8.  Place the house shape where you want it on the canvas.  Press down.
9.  Brush some Mod Podge on the back of the characters. Place them on the canvas where desired.
10.  Apply a coat over the house and characters to ensure a seal.  If required, repeat after the first coat is dry.
11. Using strong adhesive, adhere the ribbon around the edge of the canvas.  Tie a bow.
 
 
Thanksgiving Sign
 
Materials required:  - 5x7 canvas art board (from dollar store)
- Cricut Artiste cartridge (Z1790)
- Cricut machine
- cardstock in various shades
- ribbon in shades of your choosing (from Michaels)
- Mod Podge
- strong adhesive of your choice
 
 
Materials required:  - 5x7 canvas art board (from dollar store)
- Cricut Artiste cartridge (Z1790)
- Cricut machine
- cardstock in various shades
- ribbon in shades of your choosing (from Michaels)
- Mod Podge
- strong adhesive of your choice
 
A quick and easy decorative project. 
 
1.  Cut the leaf, turkey and phrase using the Cricut cartridge.
 
2.  Apply a coating of Mod Podge to the 5x7 flat canvas.
3.    Put the turkey shape where you want it on the canvas and press down.  
4.    Apply another coat of Mod Podge over the turkey.
5.    Let dry.
6.    Choose 2 or more leaves.  Put Mod Podge on the back of each leaf (or use a glue stick).
7.    Place the leaves where you want them.  Cover with Mod Podge.
8.    Repeat these steps for the words.
 
9.  If needed, add another coat of Mod Podge over the whole canvas.  Must be done when previous layers are dry.
 
10.  After the canvas is dry, if desired, apply two strips of ribbon along the left hand side.  Use strong adhesive to hold the ribbon in place.
 
11.  Use strong adhesive on the back of the canvas board.  Press the ribbon to it creating a handle. 


Halloween Pencil Toppers
 
Materials Required: - Cricut Artiste cartridge (Z1790)
- cardstock of various colours (minimum five different colours including White Daisy)
- Stamp Set: Trick or Treat Sweets (B1460) OR Frightfully Fun (B1453)
- CTMH acryllic stamps blocks of appropriate size
- Black CTMH or Stazon Ink
- 5 pencils (Dollarama)
- washi tape or glue dots
- adhesive of your choosing
- pencil crayons or markers
- googly eyes (Michaels)


Official project from CTMH - found on page 41 of the Annual Idea Book.


1.  Cut five of the star like shapes using the Cricut Artiste cartridge (page 41).  Cut five out of White Daisy cardstock at  1.75".  Cut five out of various colours of cardstock at 2".  Cut five more out of various colours of cardstock (or BT Duo papers) at 2.25".
 
2.  Stamp your chosen Halloween images on the White Daisy shapes.  Colour with pencil crayons or markers as desired.
 
3.  Glue the white shape (with the Halloween character image on it) to the medium size shape.  Then glue these to the large shape.
 
4.  Repeat 5x.
 
5.  Attach the pencil toppers to the pencils using washi tape or glue dots.


Fall Themed Picture Frame
 
Materials Required:
- a wooden frame (Michaels)
- Mod Podge or other sealing adhesive
- Cricut Art Philosophy cartridge (Z1686) & Artiste cartridge (Z1790)
- Cricut machine
- cardstock in colours of your choosing


1.  Cut fall shapes as required using the Cricut Artiste or Art Philosophy cartridges.
 
2.  Glue layers together using adhesive of your choice.
 
3.  Apply a layer of Mod Podge to the frame.  Press the shapes where desired.
 
4.  Apply a top coating of Mod Podge.  Leave to dry.
 
5.  Insert photo or a list of 10 things you are grateful for.


Friday, October 3, 2014

New Close to my Heart official blog

Exciting news - Close to my Heart has a new blog with great projects and tips.

Check out these two new Halloween projects:


For more information on how to make these great decor projects, check out the new Close to my Heart blog at: http://blog.closetomyheart.com/2014/10/03/hauntingly-trendy-home-decor

To order product, please check out my website at kwregion.ctmh.com.

Happy crafting!

Wednesday, September 24, 2014

More beautiful and simple cards from Artfully Sent

I am having so much fun playing with the new Close to my Heart Cricut cartridge Artfully Sent.

The cards are beautiful and so simple and quick to make.


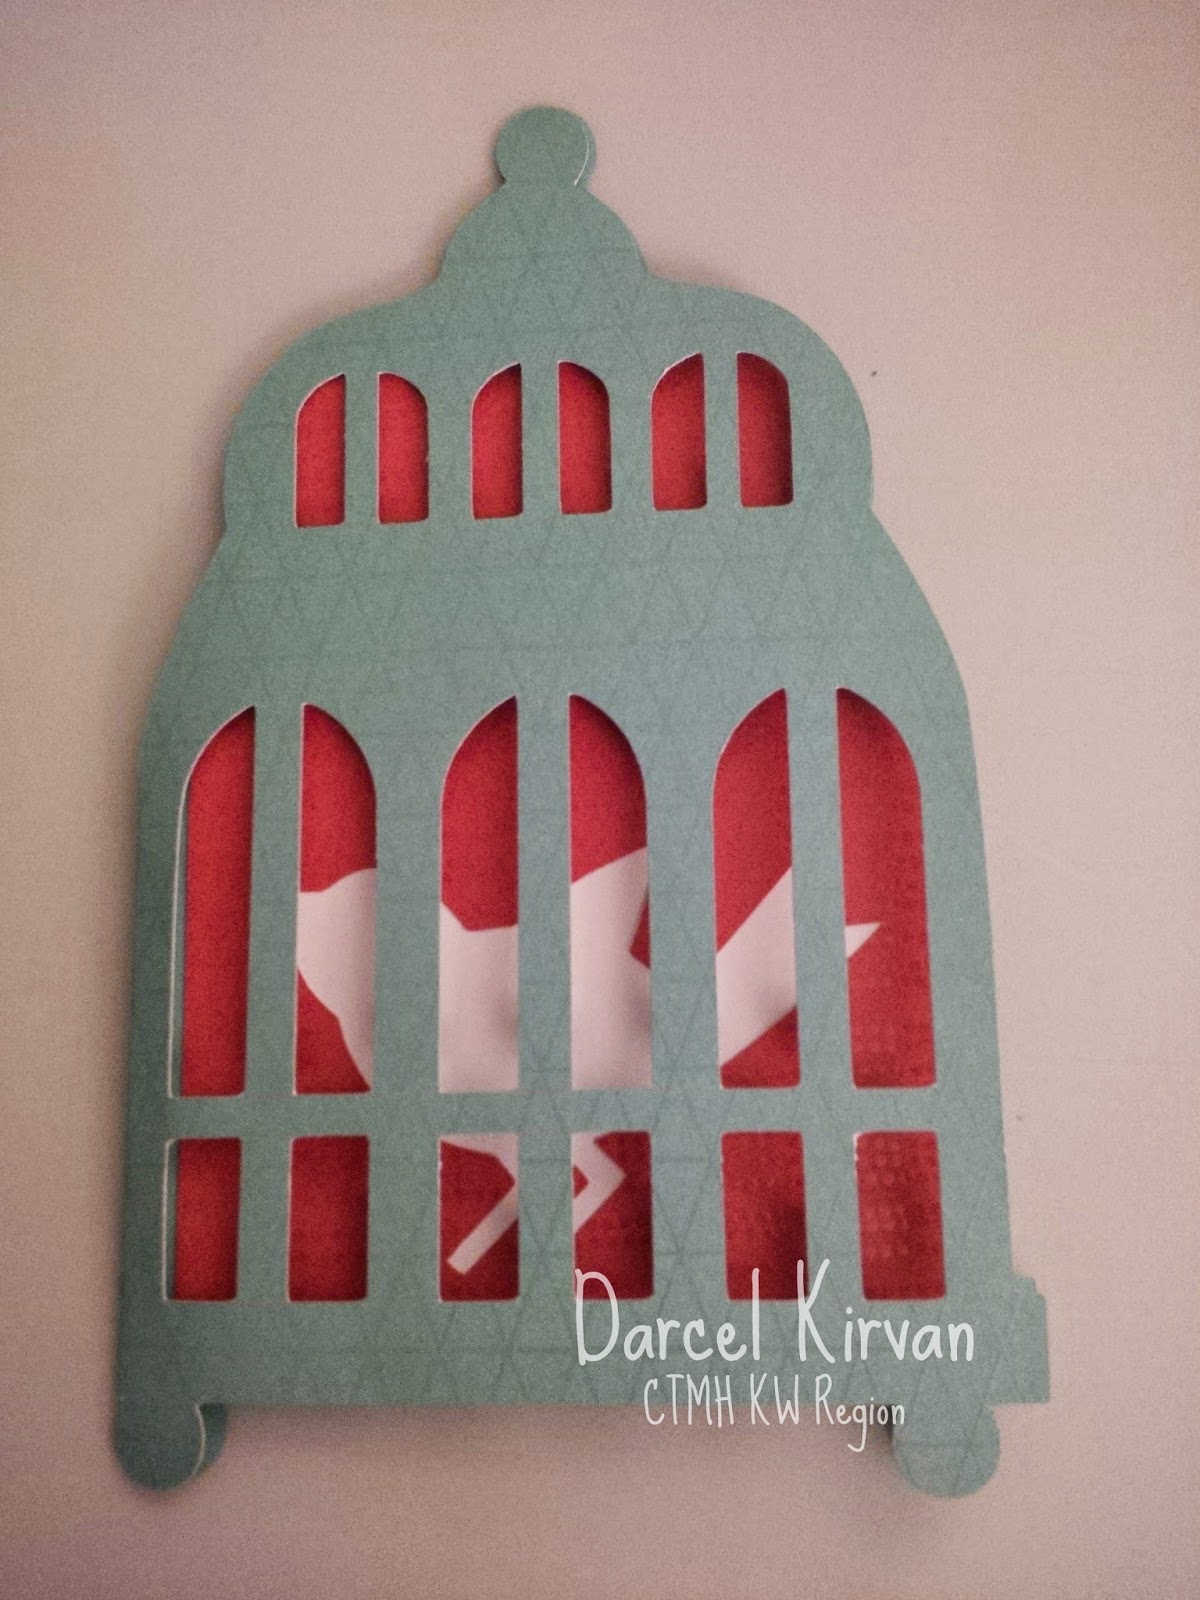
I used the Free to Be promotional package of paper to create this card (along with White Daisy cardstock.) 

This card is made in four simple steps:
1 & 2. Cut out the cage (outer card) and the cage lining (inner cage)
3.  Cut a square of white cardstock and adhere behind the bird shaped opening.
4.  Adhere the cage lining to the cage card.  

You are done.  It's that simple!


I used the retired Jubilee B&T Duo paper for this card (along with White Daisy cardstock).  The great thing about this style of card is that it really shows off the two sides of a B&T Duo sheet of paper.  Also, the contrast is already built in to the card.  Just cut the main card and the white lining.  Glue them together and it is finished!


This card used the Free to Be Me promotional paper.  Again only two cuts on the Cricut machine.  Glue together.  Bend/fold.  You are done!

For more information on Artfully Sent or other CTMH products, please contact me at closetomyheartkw@gmail.com or check out my website at kwregion.ctmh.com.