Showing posts with label My creations. Show all posts

Thursday, August 20, 2015

Sneak Peak of the Annual Inspirations 2015-16

Welcome to the Brae-er Team Blog Hop! 

This month we want to give you a preview of products from the 
new Annual Inspirations Idea Book 2015-16.

If you have come from Tamara's blog, then you're on the right track.  
If not, this is a circular blog and you can pick up anywhere and see all of the posts.


Inspiration is essential in any art form from painting to papercrafting and it is a fundamental quality of Close to my Heart products from the exciting papers to the beautiful ink colours.  With each new Idea Book, we are introduced to new sources of creativity.  I don’t know about you, but I feel like it’s Christmas and I’m sneaking a peak at my presents when I get to page through a new catalogue.  I make my wish list and can’t wait to buy all my new favourites.  

This month you also get a sneak peak of the new Annual Inspirations 2015-16 through the Zoe line of papers, accessories and Workshop on the Go kit. (All of which are currently available for purchase and will remain so until the end of August 2016.)
Figuring out what to make this month was quite easy.  I started with the Zoe paper and accessories, along with my chosen photos. In need of inspiration and speed, I turned to the How-To Foundation line of books.  With seven photos (six horizontal and one vertical), I turned to the “Easy Inspiration” layout in the Cherish book (found on pages 106-107).  It was a perfect fit for my photograph requirements, plus a great chance to use multiple papers and patterns from the new Zoe papers.


Supplies:
PAPER:
-          Zoe paper pack (X7197B) 
           Glacier cardstock (X5770)
-          White Daisy cardstock (1385)
ACCESSORIES:
-          Coral shimmer trim (Z3088) - currently available in the Zoe WOTG kit
-          Zoe assortment (Z3082)
-          Zoe complements (X7197C)
-          Black enamel stars (retired item)
HOW-TO BOOKS:
-          Cherish Scrapbook Program (9038)
-    STAMPS:
-          Handwritten Print (E1030)
INKS:
-          Sorbet (Z2164)
-          Sweet Leaf (Z2153)


Card Series
This series of cards uses the paper and colours of the Zoe paper pack and is inspired by the Wishes Card Confidence book.


 Card #1 – “Collage”
Collage design on page 97 – Wishes Card Confidence Program


Stamps Used: - “Thinking of You” from August Stamp of the Month: Framed (S1508)
-          Flower from September Stamp of the Month: Paper Garden (S1509)

Card #2 – “Card 3”
Card 3 design on page 23 -  Wishes Card Confidence Program


Stamps Used: 
- “For You” from August Stamp of the Month: Framed (S1508)
- Flower from September Stamp of the Month: Paper Garden (S1509)

Card #3 – “Card 3”
Card 3 design on page 23 -  Wishes Card Confidence Program


Stamps Used:
 - “Thinking of You” from Have a Happy Day (D1616)
-   Flower from September Stamp of the Month: Paper Garden (S1509)

Card #4 – Pinterest inspired
This card takes its inspiration from another source: Pinterest. The colours are inspired by the Zoe paper colours.


Stamps Used: 
- “Thinking of You” from Seaside Greetings (D1609)
-   Flowers from September Stamp of the Month: Paper Garden (S1509)


August 2015 SOTM - Framed (S1508)

September 2015 SOTM - Paper Garden (S1509)


Supplies:
PAPER:
-          Zoe paper pack (X7197B)
       Glacier cardstock (X5770)
-          White Daisy cardstock (1385)
ACCESSORIES:
-          Coral shimmer trim (Z3088)
HOW-TO BOOKS:
-          Wishes Card Confidence Program (9041)
STAMPS:
-          August Stamp of the Month: Framed (S1508)
-          September Stamp of the Month: Paper Garden (S1509)
-          Seaside Greetings (D1609)
-          Have a Happy Day (D1616)
INKS:
-          Sorbet (Z2164)
-          Sweet Leaf (Z2153)
-          Canary (Z2643)
-          Black (Z2105)


Benefits of the CMTH How-To Publications
-         -  Inspiration for proven effective scrapbook layouts (or card designs)
-          - Each sketch or design provides basic information: number of photos used, cut sizes             and layout
-          - Diagrams and instructions are easy to read and follow
-          - Offers suggestions for changing the photo numbers and sizes for other possibilities               using the same sketch
-          - Ease of use – can search sketches by number of photos used
-          - Great for beginners to teach the basics
-          - Great for experienced crafters to add to their repertoire
-          - Endless possibilities - each sketch design can be rotated or combined with other                   sketches to create new looks and options
-          - Layouts don’t limit your own personal creativity
-          - Many of the books also teach stamping or papercrafting techniques
-          - Quick, easy and beautiful layouts that can be used over and over again


Cherish (9038)


Wishes (9041)
        
For more information on any of these Close to my Heart products, 
contact your CTMH consultant,
or check out my website at kwregion.ctmh.com.

Now check out the next blog in our hop: Heather Steeves.

Thursday, May 7, 2015

Taste of Summer - Team Brae-er Blog Hop


Welcome to the Brae'er's Blog Hop!

April showers bring May fruit?? Well not in this country! So instead we will be highlighting the May constant campaign Taste of Summer (I know some of you still will have snow but we will go with it!) 

If you have come from Sheri Ballantyne's Just Scrap It blog, you are in the right place!


The bright and cheery colours in the Taste of Summer paper package are great for all kinds of projects. Like all CTMH papers, they have prints on both sides!

CC1038 - Only $8.95 during the month of May. Each package contains two sheets of each design.

For this blog, I decided to focus on making scrapbook pages that do not require any stamping.  They can be enhanced with diecuts, other embellishments or if so desired, stamping. (CTMH even has a coordinating stamp that is available only during the month of May.)
CC1039 - D sized stamp set $19.75

The citrus slices are very versatile - depending on how you ink them they can be limes, lemons, oranges or grapefruits!

For inspiration I used the Reflections Scrapbook Program book (9037).  

Some quick, easy and effective layouts:


#4n: Main Frame – Wrap Around, page 65


#5c: Front & Center – Trio, page 70


#7i: Triple Play - Foundation, page 102


#7b: Triple Play - Tagline, Page 95

* not from Reflections book - sunburst pattern found on many intenet sites*

Sunburst pattern with photo


For more information on the Taste of Summer paper pack or stamp, or the Reflections book,
contact your CTMH consultant,
or check out my website at kwregion.ctmh.com.

Now check out the next blog in our hop: Lucy Imrie at Lucy's Creative Expressions.


Thursday, October 9, 2014

Lots of crafting on World Cardmaking Day

October 4th was World Cardmaking day!
 
Alas, I did not spend it making cards; however, I did spend it making some great fall themed projects with a group of enthusiastic adults in Woodstock.


We made four projects:
- a haunted house canvas
- a Thanksgiving sign
- Halloween pencil toppers
- a fall themed picture frame
 
Haunted House Canvas
 Materials required:
 - scissors
- 6x6 canvas (Z1818)
- various colours of cardstock: black, white daisy, honey,
- acrylic paint
- brush or sponge
- Mod Podge
- ribbon (from Michaels)
- pencil crayons or markers
- Cricut artbooking cartridge (Z1906)
- Cricut machine
- Stamp set Frightfully Fun (B1453)


1.   Paint the canvas with an acryllic paint colour of your choice.  This one combines purple with some olive green.  Set aside to let it dry.
 
2.  Stamp four to six Halloween characters on a strip of white cardstock. Set aside to let the ink dry completely so that it won't smudge.

3.   Colour the characters with pencil crayons or markers as desired.
4.  Cut out the characters using scissors.
5.  Cut out the haunted house shape from the Artbooking cartridge (page ).   Cut at  4.75" Real Dial Size.
 

6.  Use scraps of Honey cardstock to fill in the windows with the appearance of light. 
 
7.  Apply a coating of Mod Podge to the now dry canvas.
 
8.  Place the house shape where you want it on the canvas.  Press down.
9.  Brush some Mod Podge on the back of the characters. Place them on the canvas where desired.
10.  Apply a coat over the house and characters to ensure a seal.  If required, repeat after the first coat is dry.
11. Using strong adhesive, adhere the ribbon around the edge of the canvas.  Tie a bow.
 
 
Thanksgiving Sign
 
Materials required:  - 5x7 canvas art board (from dollar store)
- Cricut Artiste cartridge (Z1790)
- Cricut machine
- cardstock in various shades
- ribbon in shades of your choosing (from Michaels)
- Mod Podge
- strong adhesive of your choice
 
 
Materials required:  - 5x7 canvas art board (from dollar store)
- Cricut Artiste cartridge (Z1790)
- Cricut machine
- cardstock in various shades
- ribbon in shades of your choosing (from Michaels)
- Mod Podge
- strong adhesive of your choice
 
A quick and easy decorative project. 
 
1.  Cut the leaf, turkey and phrase using the Cricut cartridge.
 
2.  Apply a coating of Mod Podge to the 5x7 flat canvas.
3.    Put the turkey shape where you want it on the canvas and press down.  
4.    Apply another coat of Mod Podge over the turkey.
5.    Let dry.
6.    Choose 2 or more leaves.  Put Mod Podge on the back of each leaf (or use a glue stick).
7.    Place the leaves where you want them.  Cover with Mod Podge.
8.    Repeat these steps for the words.
 
9.  If needed, add another coat of Mod Podge over the whole canvas.  Must be done when previous layers are dry.
 
10.  After the canvas is dry, if desired, apply two strips of ribbon along the left hand side.  Use strong adhesive to hold the ribbon in place.
 
11.  Use strong adhesive on the back of the canvas board.  Press the ribbon to it creating a handle. 


Halloween Pencil Toppers
 
Materials Required: - Cricut Artiste cartridge (Z1790)
- cardstock of various colours (minimum five different colours including White Daisy)
- Stamp Set: Trick or Treat Sweets (B1460) OR Frightfully Fun (B1453)
- CTMH acryllic stamps blocks of appropriate size
- Black CTMH or Stazon Ink
- 5 pencils (Dollarama)
- washi tape or glue dots
- adhesive of your choosing
- pencil crayons or markers
- googly eyes (Michaels)


Official project from CTMH - found on page 41 of the Annual Idea Book.


1.  Cut five of the star like shapes using the Cricut Artiste cartridge (page 41).  Cut five out of White Daisy cardstock at  1.75".  Cut five out of various colours of cardstock at 2".  Cut five more out of various colours of cardstock (or BT Duo papers) at 2.25".
 
2.  Stamp your chosen Halloween images on the White Daisy shapes.  Colour with pencil crayons or markers as desired.
 
3.  Glue the white shape (with the Halloween character image on it) to the medium size shape.  Then glue these to the large shape.
 
4.  Repeat 5x.
 
5.  Attach the pencil toppers to the pencils using washi tape or glue dots.


Fall Themed Picture Frame
 
Materials Required:
- a wooden frame (Michaels)
- Mod Podge or other sealing adhesive
- Cricut Art Philosophy cartridge (Z1686) & Artiste cartridge (Z1790)
- Cricut machine
- cardstock in colours of your choosing


1.  Cut fall shapes as required using the Cricut Artiste or Art Philosophy cartridges.
 
2.  Glue layers together using adhesive of your choice.
 
3.  Apply a layer of Mod Podge to the frame.  Press the shapes where desired.
 
4.  Apply a top coating of Mod Podge.  Leave to dry.
 
5.  Insert photo or a list of 10 things you are grateful for.


Wednesday, September 24, 2014

More beautiful and simple cards from Artfully Sent

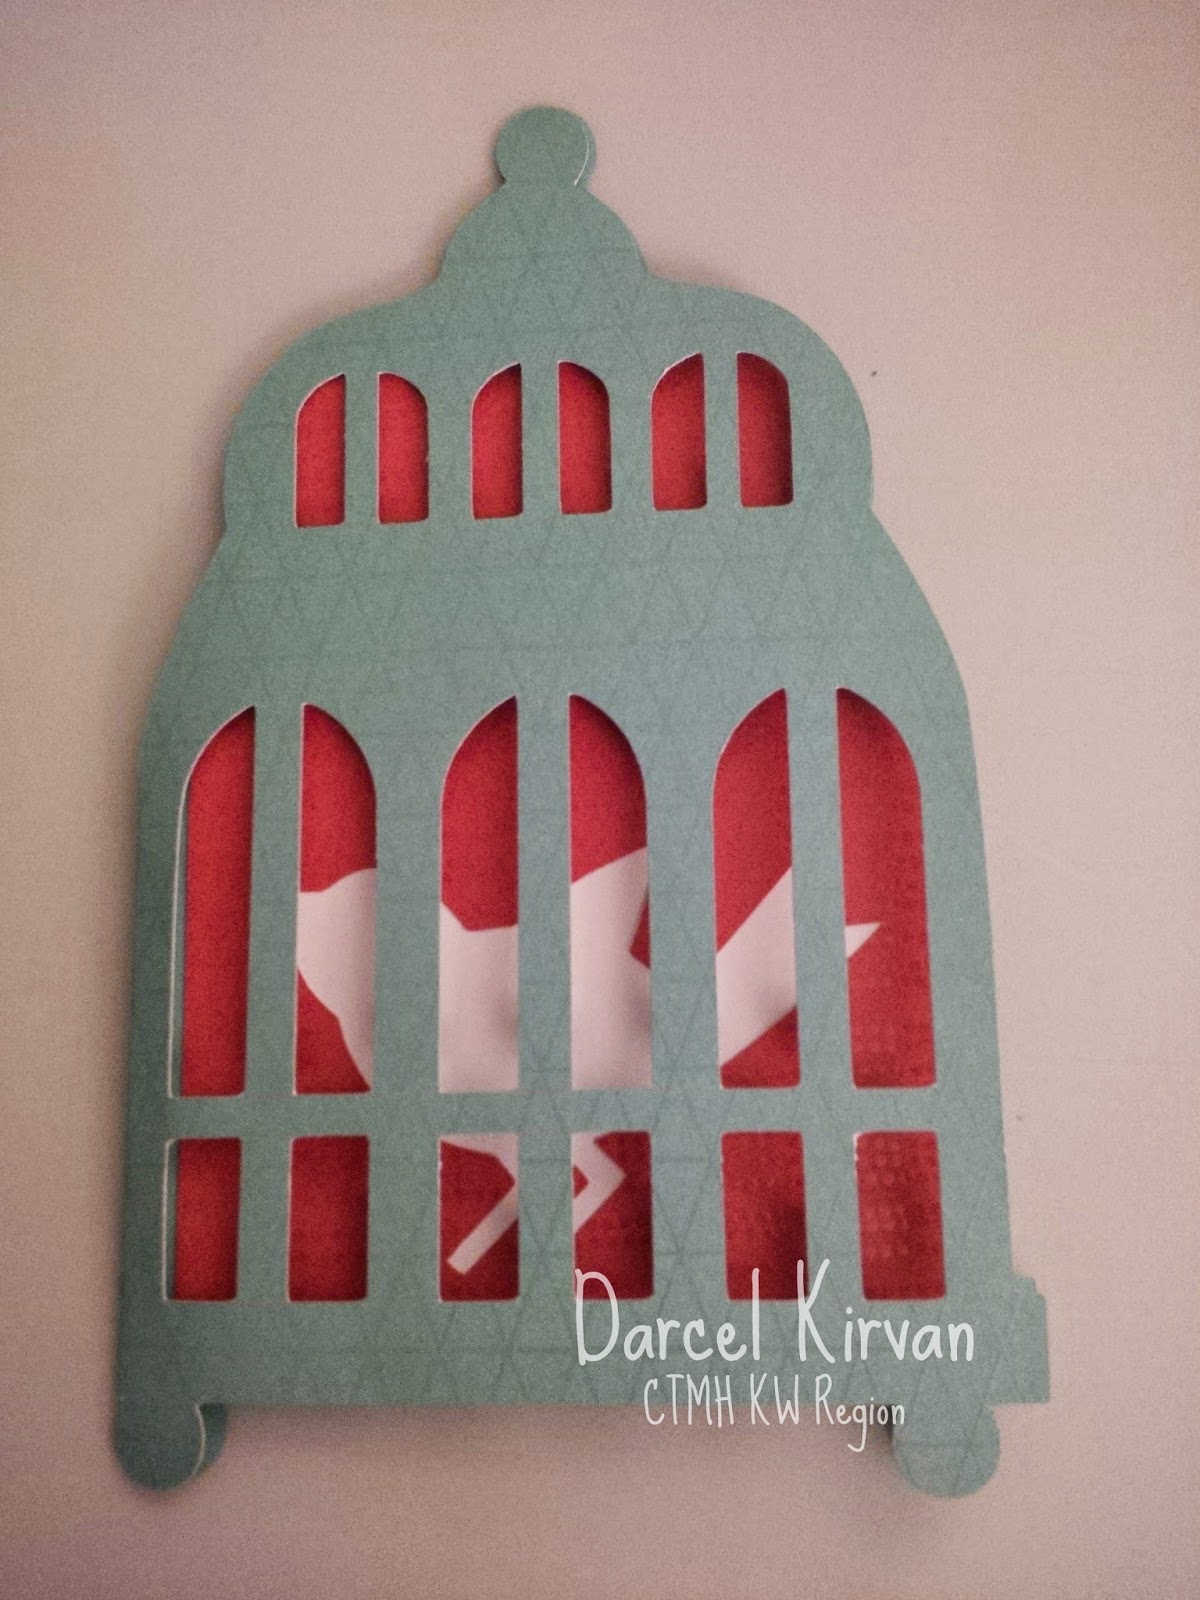
I am having so much fun playing with the new Close to my Heart Cricut cartridge Artfully Sent.

The cards are beautiful and so simple and quick to make.


I used the Free to Be promotional package of paper to create this card (along with White Daisy cardstock.) 

This card is made in four simple steps:
1 & 2. Cut out the cage (outer card) and the cage lining (inner cage)
3.  Cut a square of white cardstock and adhere behind the bird shaped opening.
4.  Adhere the cage lining to the cage card.  

You are done.  It's that simple!


I used the retired Jubilee B&T Duo paper for this card (along with White Daisy cardstock).  The great thing about this style of card is that it really shows off the two sides of a B&T Duo sheet of paper.  Also, the contrast is already built in to the card.  Just cut the main card and the white lining.  Glue them together and it is finished!


This card used the Free to Be Me promotional paper.  Again only two cuts on the Cricut machine.  Glue together.  Bend/fold.  You are done!

For more information on Artfully Sent or other CTMH products, please contact me at closetomyheartkw@gmail.com or check out my website at kwregion.ctmh.com.

Tuesday, December 17, 2013

First home gathering

My first home gathering was a small one, but a good one!  We had a blast making simple Christmas tags to use on our Christmas presents and holiday gifts.

Guests were excited to use a full range of ink colours so they were creative and did their own things with the tags.  They also used other holiday themed stamp sets to create the looks they wanted.

The tag design (a CTMH gathering project design) that inspired it all:


Materials and tools used:
Paper: Frosty B&T Duo and Colonial White cardstock
Stamps: Holiday Tags (D1560)
Inks: Slate (Z2173) and Champagne (Z2174)
Accessories: Clear sparkle flourishes
Die cut tags: Cricut Artiste collection (Z1790)


Below are the tags made by my guests at the party.  (My apologies the pictures were taken on a cell phone in unfavourable lighting.)


Even  my husband got in on the fun.  (In fact, I think he had more fun than anyone playing with the Glitter gel, stamps and inks).