Thursday, May 7, 2015

Triple Layer Card (a.k.a. Triple Time Stamping)

Supplies Needed:
-          Masking tape, painters tape or washi tape (a light adhesive to hold your paper together while stamping – it should be easily removed so as not to tear your cardstock)
-          White, cream or light coloured cardstock for stamping on
-          Coloured cardstock for the card base and framing layers
-          Inks
-          Stamps
-          Adhesive of your choice for final card assembly
-          Other decorative elements as desired (eg: ribbon, string, sequins, die cuts etc.)

Triple Layer Cards or Triple Time Stamping Technique

Finished card size will be 4 ¼” x 5 ½”

You need to cut six pieces for each card - three in white or light coloured cardstock for stamping on, and three in coloured cardstock for card base and mats/frames/borders.

1.            Cut the cardstock that you will be stamping on to the following sizes:
(white or light coloured cardstock recommended)
                - 2” x 3 ¼”
                - 3” x 4 ¼”
                - 4” x 5 ¼”

2.            Cut the coloured cardstock for mats and the card base to the following sizes:
                - 2 ¼” x 3 ½”
                -  3 ¼” x 4 ½”
                - 5 ½” x 8 ½” 

3.            Put some non permanent, light adhesive on the back of the smallest white/light piece (2” x 3 ¼”).  Tape/adhere this to the centre of the middle sized piece (3” x 4 ¼”). Put same adhesive on the back of this layered middle sized piece and adhere it to the centre of the large sized piece (4” x 5 ¼”). This adhesive will help hold the layers together while you are stamping to ensure that the images don’t smudge or move.
                                     
4.            Stamp your desired images and/or phrases onto this stack of papers.  Be sure to stamp the images across the layers.

TIP: There will be gaps in the stamping due to the layers.  This will get covered up when the final card is assembled.


5.            Finish stamping.  Let dry.  Once the stamping is dry, separate the three layers. Be careful so as to ensure that you don’t rip any of the layers.


6.            Using your permanent adhesive, glue the smallest stamped piece (2” x 3 ¼”) to the smallest coloured cardstock piece (2 ¼” x 3 ½”).  Be sure that the stamped piece is centred on the coloured cardstock.

7.            Next adhere the mid-sized stamped piece (3” x 4 ¼”) to the mid-sized coloured cardstock (3 ¼” x 4 ½”). Follow this with adhering the largest stamped piece (4” x 5 ¼”) to the largest coloured cardstock piece (5 ½” x 8 ½”) .
                                        
TIP: I found it easier to fold the 5 ½” x 8 ½” cardstock base in half before adhering the layers to it.

8.            Now adhere the three layered pieces together in the proper order (small to the mid-sized, mid-sized to the large).  Be sure to line up the images as you are finalizing the layering.


Here are some samples of cards I made using this technique:

Stamps – C1607 Someone Special
Inks – Slate (Z2173), Cranberry (Z2116)
Cardstock – Cranberry (1272), White Daisy (1385)

Stamps – bird & sentiment, C1613 Paper Bird (Hostess Rewards)
-          Spiral circles, C1610 Dizzy Circles
Inks – Honey (Z2162), Indian Corn Blue (Z2130), Black (Z2105)
Cardstock – Honey (X5568), White Daisy (1385)


Stamps – C1613 Paper Bird (Hostess Rewards)
Inks – Slate (Z2173), Thistle (Z2640), Pixie (Z2644)
Cardstock – Thistle (X5769), White Daisy (1385)


Stamps – C1577 Mother’s Day
Inks – Black (Z2105), Cranberry (Z2116)
Cardstock – Cranberry (1272), White Daisy (1385)


Stamps – C1607 Someone Special
Inks – Slate (Z2173), Cranberry (Z2116)
Cardstock – Cranberry (1272), White Daisy (1385)


Stamps – C1578 Camper Crazy
Inks – Cranberry (Z2116), Slate (Z2173), Topiary (Z2155)
Cardstock – White Daisy (1385) and Cranberry (1272)
Stamps – C1556 Paisley Perfect
Inks – Gypsy (Z2190), Thistle (Z2640)
Cardstock – White Daisy (1385) and non CTMH purple cardstock


21

Taste of Summer - Team Brae-er Blog Hop


Welcome to the Brae'er's Blog Hop!

April showers bring May fruit?? Well not in this country! So instead we will be highlighting the May constant campaign Taste of Summer (I know some of you still will have snow but we will go with it!) 

If you have come from Sheri Ballantyne's Just Scrap It blog, you are in the right place!


The bright and cheery colours in the Taste of Summer paper package are great for all kinds of projects. Like all CTMH papers, they have prints on both sides!

CC1038 - Only $8.95 during the month of May. Each package contains two sheets of each design.

For this blog, I decided to focus on making scrapbook pages that do not require any stamping.  They can be enhanced with diecuts, other embellishments or if so desired, stamping. (CTMH even has a coordinating stamp that is available only during the month of May.)
CC1039 - D sized stamp set $19.75

The citrus slices are very versatile - depending on how you ink them they can be limes, lemons, oranges or grapefruits!

For inspiration I used the Reflections Scrapbook Program book (9037).  

Some quick, easy and effective layouts:


#4n: Main Frame – Wrap Around, page 65


#5c: Front & Center – Trio, page 70


#7i: Triple Play - Foundation, page 102


#7b: Triple Play - Tagline, Page 95

* not from Reflections book - sunburst pattern found on many intenet sites*

Sunburst pattern with photo


For more information on the Taste of Summer paper pack or stamp, or the Reflections book,
contact your CTMH consultant,
or check out my website at kwregion.ctmh.com.

Now check out the next blog in our hop: Lucy Imrie at Lucy's Creative Expressions.


Tuesday, March 10, 2015

Get it before it's gone - Seasonal Expressions 1


Welcome to the Brae-er's Circular Blog Hop!  This month we are focusing on the products we love from the Seasonal Expressions 1 Idea Book.  Many of the fantastic items in this book are only available to order until the end of March. Hopefully, you will be inspired by the blogs in this hop and get your Seasonal Expressions 1 items before they are gone forever!

There are so many great products to choose from: Heartstrings paper pack and accessories (it's one of my favourite CTMH papers ever), Hopscotch paper pack and accessories, You're The Bomb stamp set (which features many great sayings), the puffy stickers and so much more. 

The product I choose to focus on is the Hopscotch Picture My Life (Z3045). There are enough cards in one small pack to make so many things.  I made two My Creations Mini Books (Z3044 and Z3043).  (These Mini Books were introduced in the Seasonal Expressions 1 Idea Book but they will continue to be availalbe after March.)

One book is  an overview of the four seasons of 2014, while the other is more of a journal about me (my favourite things, friends, etc.)  Completing these two books took less than half the Picture My Life cards leaving enough to complete some standard scrapbooking layouts, Picture My Life pocket scrapbooking layouts and even greeting cards.  The possibilities for these cards are endless! Better still, the cards make projects so quick to complete. 

The Hopscotch paper and Picture My Life series are so bright and colourful - applicable to so many situations.  I also like that many of the PML cards focus on happiness -  a concept that should be celebrated.

Now all I need to do is add photos, stamps and other items to personalize my mini albums even further!

Here are a few of the pages:

Year in Review - The Four Seasons mini album

Layer two 4"x6"cards for the cover design

Add personal details to this card.  I am
going to add the numbers so that the card says Happy 2014.

Beside the winter themed card, add a 3"x 4" picture.

On the cloud and rainbow card you can add photos or journaling
to celebrate your Spring highlights.

Add a list of summer highlights to the flower card.

Add a fall themed photo to the ornate orange frame card.


All About Me mini album


For more information on Hopscotch Picture My Life or other Seasonal Expressions 1 products speak to your CTMH consultant or check out my website at kwregion.ctmh.com.

Now check out the next blog in our hop:Jessica Fenn Hill's Create by the Lake 

Tuesday, February 24, 2015

Exclusive Inks™ Re-inker and Spray Pen

Picture My Life™ scrapbooking programs


So many great things can be made with Picture My Life!  Obviously, the sets are created for perfect pocket scrapbooking; however, the cards can also be used to create more traditional scrapbook layouts, greeting cards, mini albums and so much more.  Check it out:


To order Picture My Life sets, check out my website: kwregion.ctmh.com


Cricut® Artfully Sent: Sleeve Function

Sunday, February 22, 2015

Hopscotch and Heartstrings Side Step Cards

Singing Butterfly Adornments
Darcel Kirvan – An Independent Close to my Heart Consultant

Side Step Cards
This style of card is actually very easy to make, but the depth and dimension make it look complex.  You will impress friends and family alike.  (My husband asked if the cards were cut on the Cricut.)

Supplies Needed:
-          Cardstock and decorative papers
-          Pencil and eraser
-          Paper cutter (or craft knife and cutting mat)
-          Scoring tool and board (or paper cutter with scoring element)
-          Stamps and inks or die cut images to decorate the card
-          Adhesive of choice

Instructions for a 5”x7” Side Step Card
1.            Choose the cardstock you would like to use for the base of your card and cut it so that is                   measures 7” x 10”.

2.            For ensured precision, I like to use small pencil markings where the cut and fold lines will be. (You can skip this step if you are confident or if you are well acquainted with your paper cutter and scoring board.) Use your ruler or cutting board to measure all of the markings and indicate with small pencil marks.  (See dimensions in steps 3, 4, 7 and 8 or refer to cutting and scoring diagram.)

3.            The first cut will be made 2” into the paper (or for a slightly wider frame use 2.5").  I usually make a pencil mark on both ends of the paper and match up my cutting board to those marks.  The marks should be made on the short side of the paper (7”).

4.            The cut is made 2.5” in from the left side of the paper.  Line up your paper on your cutting board.  Place the cutting blade 1” down.  The cut will run from 1” to 7.5” down.  (Use the arrows on the cutting blade to line up the proper dimensions.) 


5.            Cutting is now complete.

6              Place your cardstock on your scoring board.  Make sure the 10” side is running along the upper edge of your scoring board.  The score marks are going to run from the edge to the cut line.  

7.            Score the paper at 1” down, 2” down, 3.5” down and 7.5” down.  Run these score marks from the edge of the paper to the cut line.  The score marks should be 5” in length.   

8.            Do not move the paper.  Now score the entire width of the card at the 5” mark.  This score line will provide the middle fold line for your card.

9.            Remove your cardstock from the scoring board. It is now time to fold the card.  I like to start with the middle fold, but you can begin at the bottom and work to the top (or vice versa.)

10.          Now to fold the steps of the card.
a) Fold the first score line (1”) with the score line upward (mountain fold). 
b) Fold the second line (2”) with the score line downward (valley fold).
c) Continue on in this pattern – up then down or mountain then valley fold.  Third line (3.5”) is up/mountain.  Fourth line (5”) is down/valley.  (You will actually be reversing the existing fold if you starting by folding the card in half.)  Fifth line (7.5”) is up/mountain.

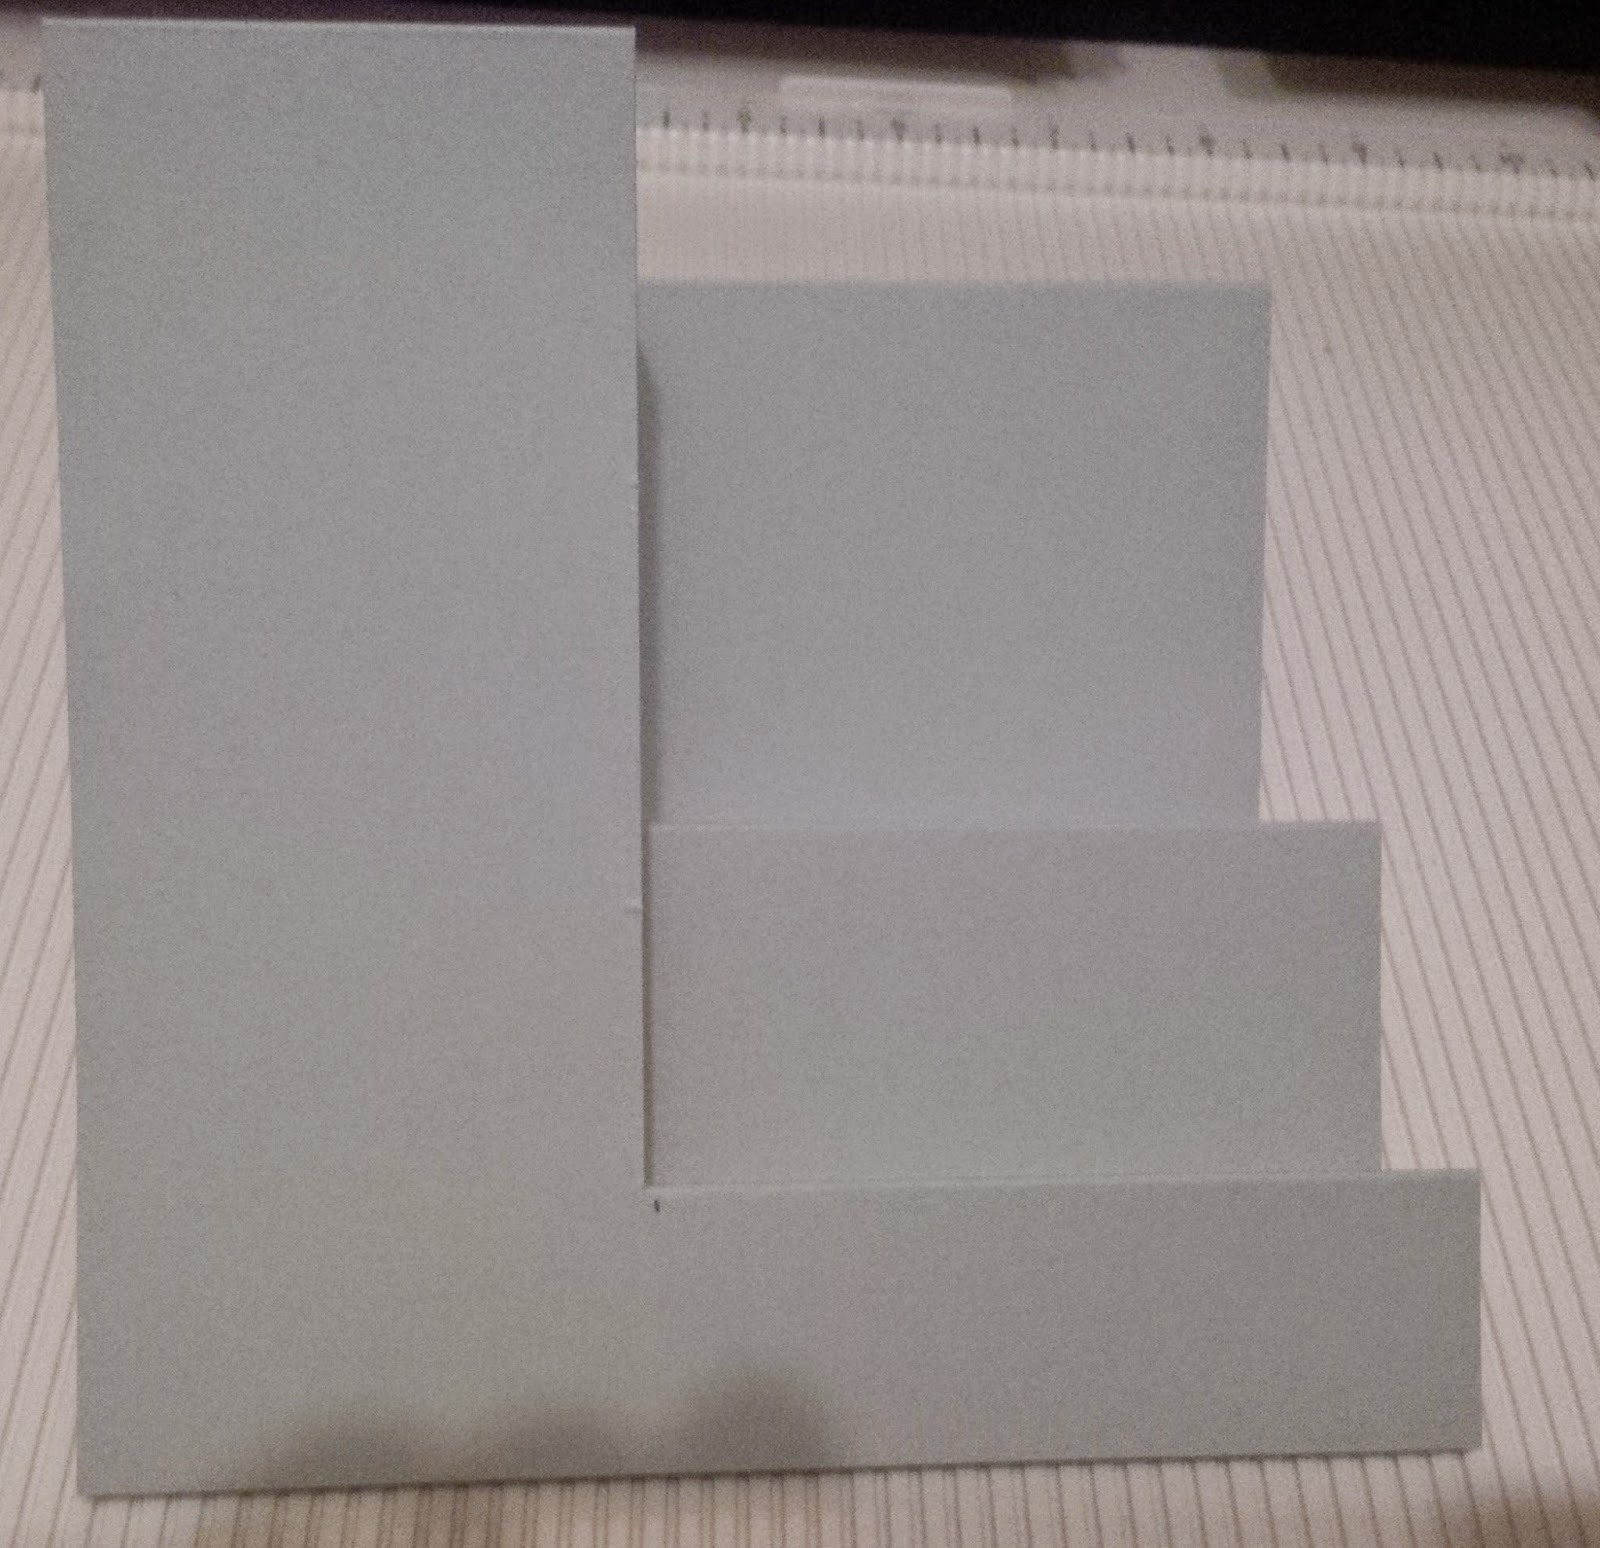
Your folded card base should now look like this:


11.          Decorate with stamps, die cuts and paper as desired.


Tip:  You can reverse the card and have the steps on the left side.


Alternate option: a 5”x5” card

This option creates a square shaped side step card. 

1.       Cut your cardstock base so that it measures 5” x 10”. 

Paper saving tip: If using a 12” piece of cardstock, you can create two card bases from only one sheet of paper.

2.       Use the same dimensions for cutting and scoring as used in the 5”x7” card above. Use the same folding instructions as well. (Steps 2 through 10.)

3.       Decorate as desired using paper, stamps and die cut images.


Supplies Used

Monster 5x5 card
Presents, birthday hat and cake slice stamps from A1143 Teddy Bear Birthday
Monster stamps and “love ya silly” sentiment from B1470 Love Ya Silly
“birthday wishes” phrase from D1514 Just a Number
Phrase balloon from S1404 Balloon Talk
Cardstock – Colonial White, Sky Blue plus B&T duo Heartstrings
Inks – Cranberry, Lagoon, Blue Sky, Whisper, Hollyhock
Plus lagoon markers,  and current Peony Shin Han marker


Cupcake 5x5 card
Cardstock – Colonial White
B&T Hopscotch
Stamp set – cupcake, display tray and “everywhere” phrase from  S1412 Cute Pie
“birthday greetings” phrase from Just a Number D1514
Inks – cupcake in Flaxen, sponged with  and marker Cherry Peony
Indian Corn Blue, Ponderosa Green